Page Contents
About FDM Monster
FDM Monster started as a fork of OctoFarm, the software for which I created the Raspberry Pi image FarmPi. The OctoFarm team has suspended development, and FDM Monster is a feasible alternative to OctoFarm. There isn’t much on their website yet. However, their Documentation is starting to grow.
David Zwart, the lead developer of FDM Monster, started this project on September 11, 2021. Since the fork, the whole application has been rewritten and upgraded to current modern standards.
What is FDM Monster
FDM Monster is a web-based application that allows you to control over 100 3D printers in one overview and arrange them on floors and shelves.
At the time of writing, the only supported platform is OctoPrint. However, development for supporting Moonraker, the engine behind Mainsail and Fluidd, has started but has not yet been released.
Requirements
For best performance, you’ll need a Synology with a processor that supports Advanced Vector Xtensions (AVX). While incomplete, most Intel Xeon and AMD Ryzen processors used in modern Synology hardware are compatible. Examples of working models are DS723+, DS923+ and DS1522+.
In this blog post, I assume you have an AVX-compatible NAS model. You can only use MongoDB version 4.4 or lower if you don’t. Using MongoDB 4.4 is at your own risk and is not supported by either the FDM Monster team or me.
You will also need at least one OctoPrint instance. However, for a Print Farm, multiple is expected. For this blog post, I’ll use 10 OctoPrint docker containers. These are all set up to use a virtual printer, a special mode for OctoPrint for development purposes.
Follow the instructions in the document: How to run Docker and Portainer on your Synology NAS. These are required steps to continue.
FDM Monster
Currently, FDM Monster uses MongoDB as the database backend. The developers are working on replacing it with SQLite. SQLite support is currently in the Alpha phase and currently not covered in this post. I will update this post once SQLite is ready for prime time.
This post has been written with FDM Monster release 1.6.2. Any releases below will not work due to changes in the docker container, which this blog post relies on.
To deploy FDM Monster on our Synology NAS, we will use docker-compose or stacks in Portainer.
DSM File Station
We will create the required MongoDB and FDM Monster folders on our Synology NAS.
- Open File Station
- Select the docker folder on the left side
- Click Create -> Create folder
- With the above steps, create the following folder structure below.
- fdm-monster
- media
- mongodb
- mongodb-data
- mongoconfig

Docker Compose prep
Next, we will create the Docker Compose file. This file can be named anything but should have the extension .yaml for code completion. I have named it docker-compose-fdm-monster.yaml. Open your favourite text editor, such as Notepad++, Visual Studio Code, or any other non-rich text editor. Create a new file and paste the code below.
---
version: "3.7"
services:
  mongodb:
    image: mongo:latest
    container_name: mongodb
    restart: always
    healthcheck:
      test: echo 'db.runCommand("ping").ok' | mongosh localhost:27017/test --quiet
      interval: 10s
      timeout: 10s
      retries: 5
      start_period: 40s
    environment:
      - MONGO_INITDB_ROOT_USERNAME=CHANGEME_USER
      - MONGO_INITDB_ROOT_PASSWORD=CHANGEME_PASS
    volumes:
      - /volume1/docker/mongodb/mongodb-data:/data/db
      - /volume1/docker/mongodb/mongoconfig:/data/configdb

  fdm-monster:
    container_name: fdm-monster
    image: fdmmonster/fdm-monster:latest
    restart: unless-stopped
    healthcheck:
      test: curl --fail http://localhost:4000 || exit 1
      interval: 30s
      timeout: 5s
      retries: 5
      start_period: 40s
    depends_on:
      - mongodb
    ports:
      - "4000:4000"
    environment:
      - MONGO=mongodb://CHANGEME_USER:CHANGEME_PASS@mongodb:27017/fdm-monster?authSource=admin
    volumes:
      - /volume1/docker/fdm-monster/media:/app/media
Change the values for CHANGEME_USER and CHANGEME_PASS to a different username and password. This can be of any value. My suggestion would be to create a strong password.
Portainer
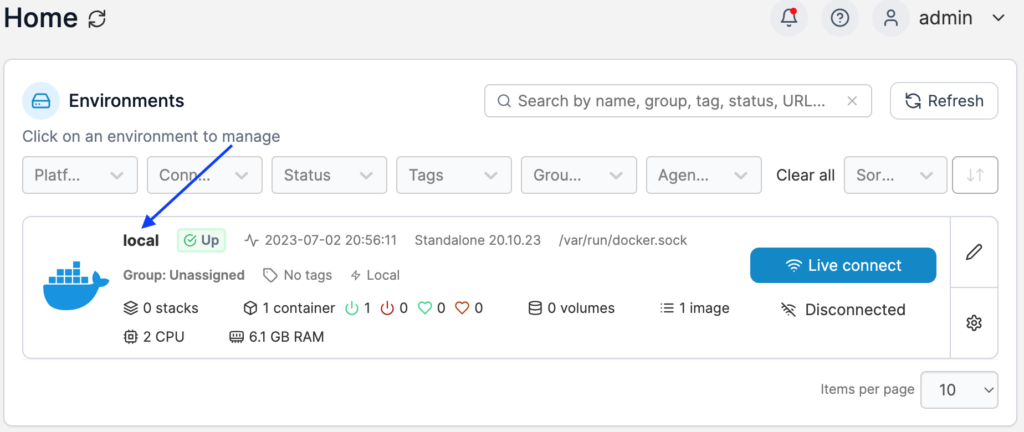
Now, switch to the Portainer web interface. It should be something like http://ip-of-synology:9000. If you have been logged out, you must log in again. Click on the local environment. Change ip-of-synology to the IP or hostname of your Synology.
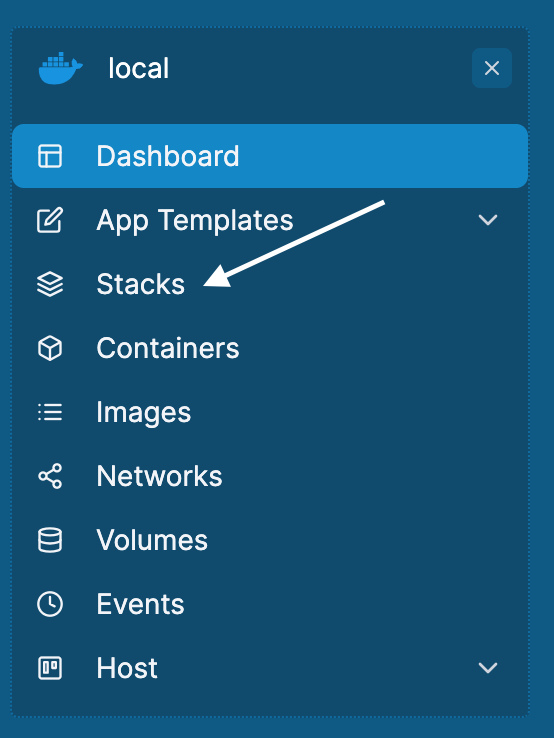
On the left side, click on Stacks
Click on the + Add stack button.

Give your stack a name in the Name field, e.g., fdm-monster. It can only contain lowercase letters. Keep the Build method in the Web editor. Paste the content of your version of docker-compose-fdm-monster.yaml and click on Deploy the stack.
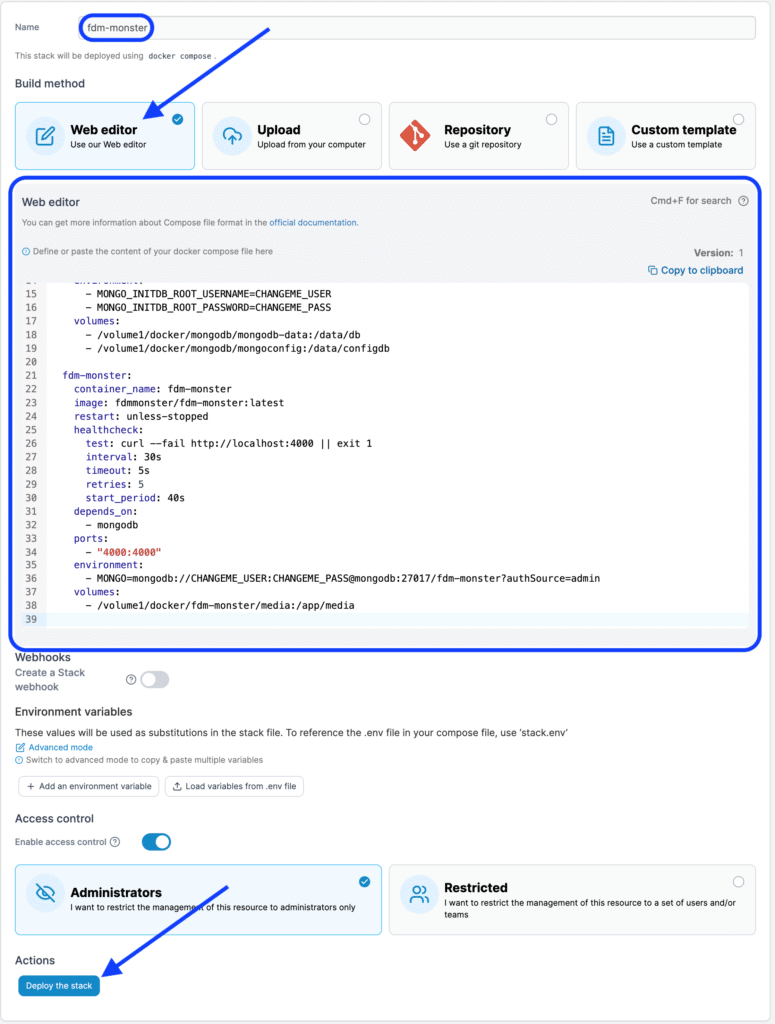
Portainer will now deploy the stack. Pulling down the images and verifying their health will take some time. Wait a couple of minutes before continuing. This will allow MongoDB and FDM Monster to be pulled from the Docker hub and the containers to start up.
Validation
To validate if FDM Monster is deployed correctly, click on the fdm-monster stack we created.

Inside this window, both containers should now show healthy. Remember that the fdm-monster container will not start and get healthy until the mongodb container is healthy.
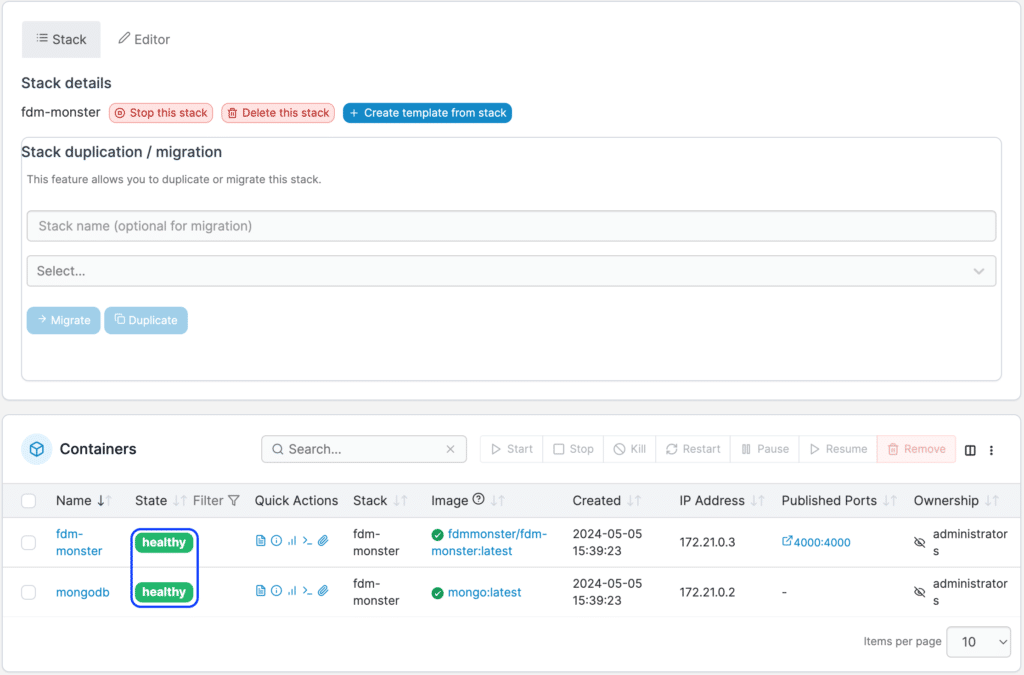
If one of the containers does not show Healthy, click on the next to the container and look at the logs to see why they aren’t healthy. If you need support, reach out to the developer on their Discord.
If you have set everything up correctly, you should be able to go to http://ip-of-synology:4000 to go to the dashboard of FDM Monster. Change ip-of-synology to the IP or hostname of your Synology.
Happy printing!
No Comments Yet