This guide for MinIO is quite advanced. It requires you to run commands on your local device.
Page Contents
About MinIO
Object Storage is available in many different ways. The most commonly known is probably Amazon’s S3. Other flavours are Azure blob storage, Wasabi (no, not the Japanese horseradish), Object First, and many others. While MinIO isn’t officially on this list, it does work. It’s a high-performance Object Storage solution that is S3-compatible, meaning that it mimics the functionality of Amazon’s S3. The performance depends on the speed of the hardware it’s running on.
There are many possibilities with MinIO, but for the ease of this blog post, I will stick with one single instance.
Requirements
For this post, I am going to use a Synology NAS. You will need a model that allows you to run Docker containers. To get started, follow the instructions in the document: How to run Docker and Portainer on your Synology NAS. These are required steps to continue.
MinIO
This guide is as-is. We are only setting up one (1) node, not a cluster. If not done correctly, data loss could occur. Deploying multiple nodes is strongly recommended when using this in a production environment! Read the MinIO documentation for more information.
DSM File Station
We will start by creating the required MinIO folders on our Synology NAS.
- Open File Station
- Select the docker folder on the left side
- Click Create -> Create folder
- With the above steps, create the following folder structure below.
- minio
- data
- minio
- certs

Certificate
While MinIO and Veeam could work without a certificate, it’s not supported. If you absolutely must do so, you can find register settings on the Veeam Forums. It will not be part of this guide.
Download the certgen application that is compatible with your device and put it in a folder. Open a terminal or command prompt. If you are running a Linux variant, BSD variant or Apple macOS, you must execute ‘chmod +x [FILENAME]‘. Replace [FILENAME] with the name of the file downloaded file. Then, execute it like the following: ‘./[FILENAME] -host “localhost,1.2.3.4,my.nas.network.name”‘. Replace [FILENAME] again with the name of the file and “localhost,1.2.3.4,my.nas.network.name” with the IP of your NAS and FQDN of your NAS. Additionally, add any other FQDNs you wish to use. Keep localhost in the list.

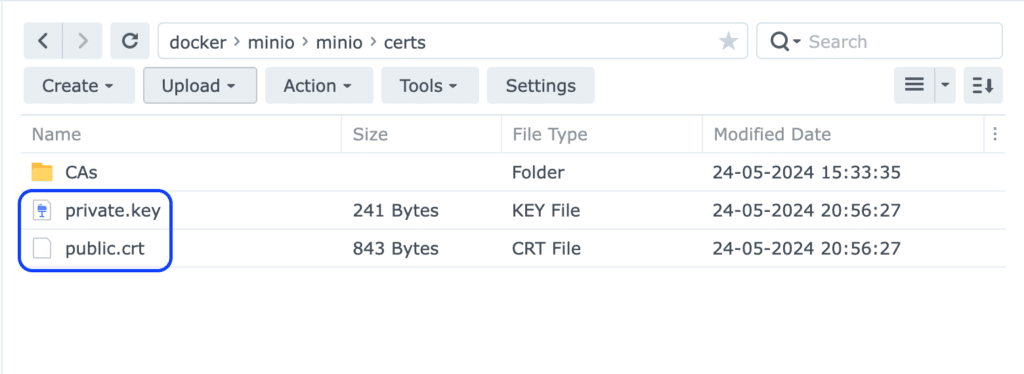
Next, we need to upload the public.crt and private.key files inside the minio/minio/certs folder on your NAS.
Inside File Station, browse to the docker/minio/minio/certs folder. Select Upload –> Upload – Overwrite. Browse to the folder where you have stored your certgen file. The two certificate files should be in the same folder.

Docker Compose
To deploy MinIO on our Synology NAS, we will use my favourite method, a stack. On your machine, create an empty text file with a .yaml extension. It can be any filename, but I suggest something like docker-compose-minio.yaml. Paste the content below. Change both CHANGEME to a username and a strong password.
---
version: "3.7"
services:
  minio:
    image: minio/minio:latest
    command: minio server /data --console-address ":9010"
    container_name: minio
    restart: always
    healthcheck:
      test: ["CMD", "mc", "ready", "--insecure", "local"]
      interval: 5s
      timeout: 5s
      retries: 5
    ports:
      - "9001:9000"
      - "9010:9010"
    environment:
      - MC_HOST_local=https://localhost:9000
      - MINIO_ROOT_USER=CHANGEME
      - MINIO_ROOT_PASSWORD=CHANGEME
    volumes:
      - /volume1/docker/minio/data:/data
      - /volume1/docker/minio/minio:/root/.minio
Portainer
Switch to the Portainer web interface on your Synology NAS. It should be something like http://ip-of-synology:9000. If required, log in. Click on the local environment. Change ip-of-synology to the IP or hostname of your Synology.
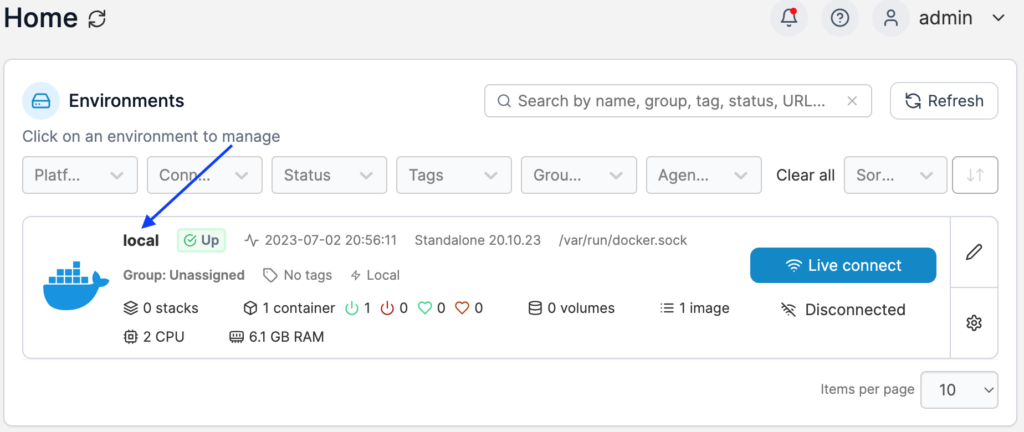
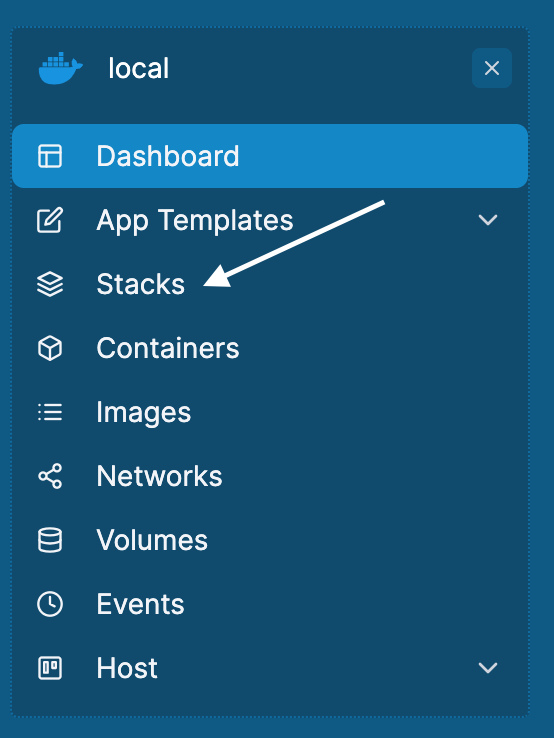
On the left side, click on Stacks
Click on the + Add stack button.

Give your stack a name in the Name field, e.g., minio. It can only contain lowercase letters. Keep the Build method in the Web editor. Paste the content of your version of docker-compose-minio.yaml.
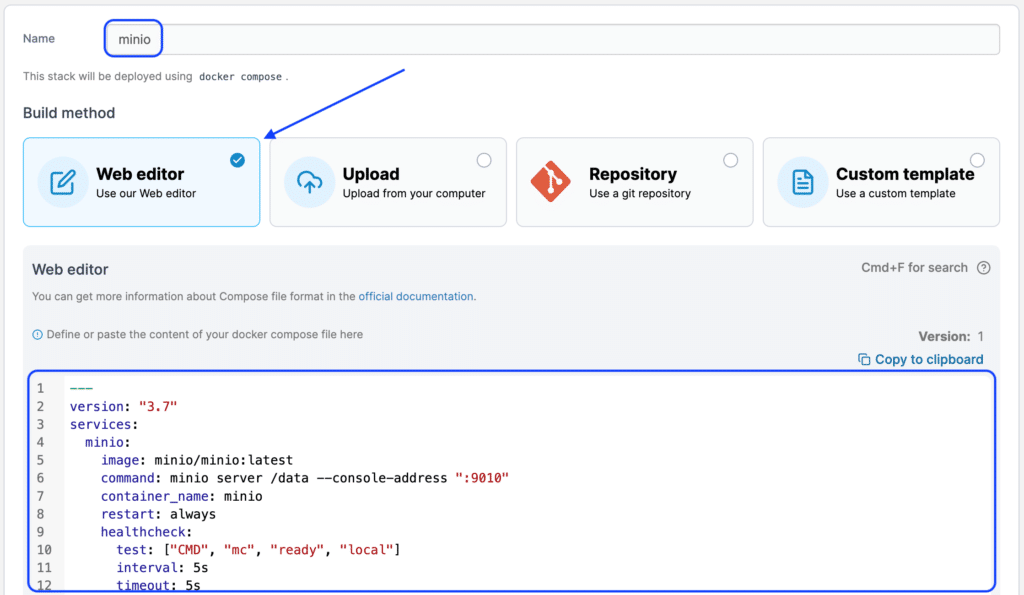
At the bottom of the page, click on Deploy the stack.

Portainer will now deploy the stack. Depending on your internet speed, this deployment might take a few seconds. It needs to download the Docker container.
Verification
You will return to the Stacks List page when the stack is deployed. Click on the newly created minio stack.

In the newly loaded page, under Containers, you should see healthy.

If the container does not show healthy, click on the next to the container’s name and look at the logs to see why they aren’t healthy. You can also click on the to see the command’s output.
MinIO configuration
This guide should be used as a proof of concept. This should not be used in production but could be used to play around in a lab environment. Read the MinIO documentation for more information.
We need to make some changes inside the MinIO web interface, such as creating buckets and authentication keys. To get started, browse to https://ip-of-synology:9010. Change ip-of-synology to the IP or hostname of your Synology. Log in with the root username and password you defined in your yaml file.
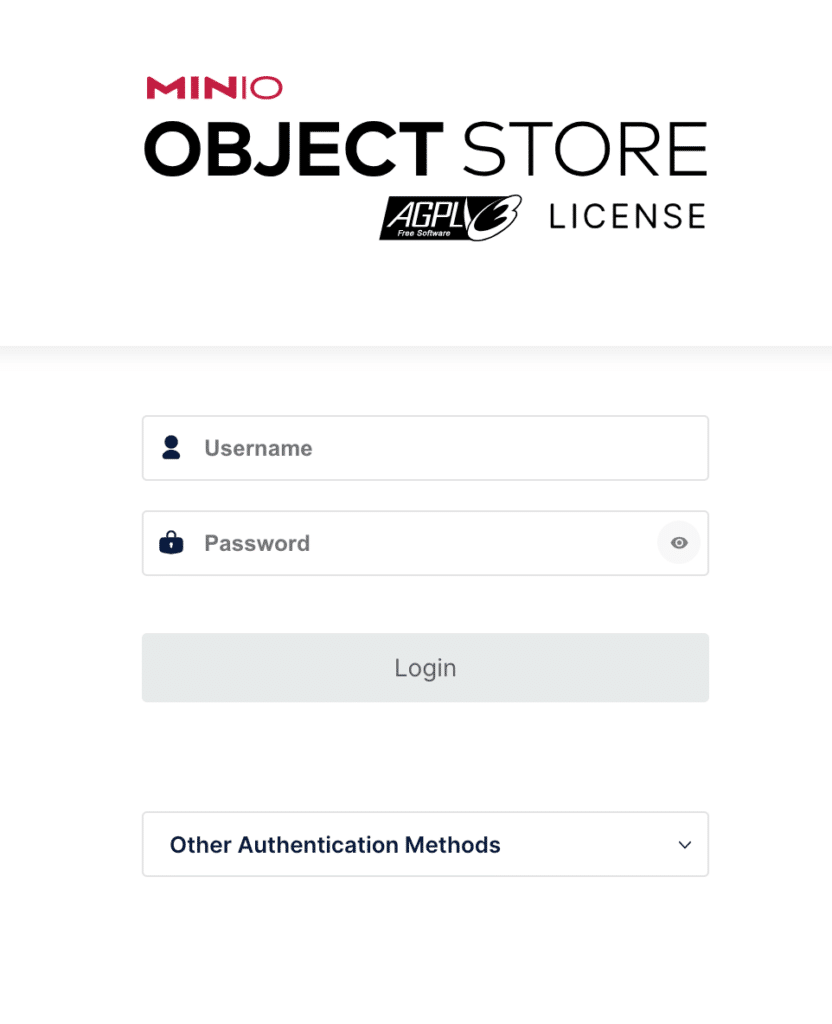
After you log in, the MinIO web interface should appear. If it hasn’t been selected already, please select the Object Browser on the left side menu.
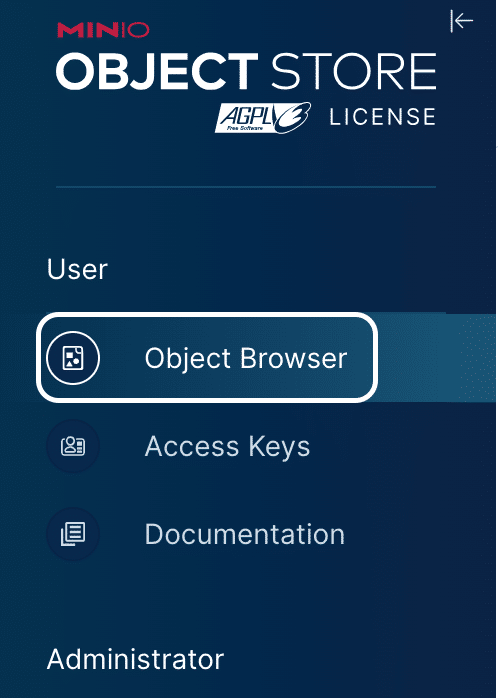
You should see an empty bucket list in the middle of the screen. This has no relation to what you want to do before you die, bucket list; it’s just a list of buckets😉. Click on the Create a Bucket link.

In the “Bucket Name” field, enter a name for your bucket. I picked “veeam”. The name can only contain lowercase letters, numbers, dots (.) and hyphens (-). Slide the slider for “Object Locking” to the ON side and click on Create Bucket.
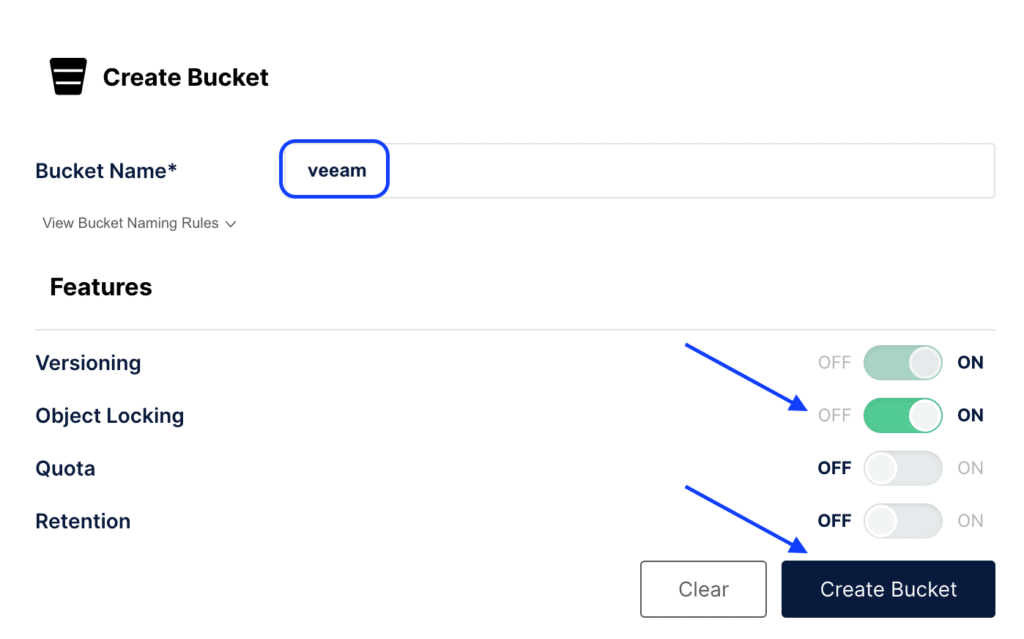
We have created our first bucket. We now need to create an Access Key, which is bound to your admin user.
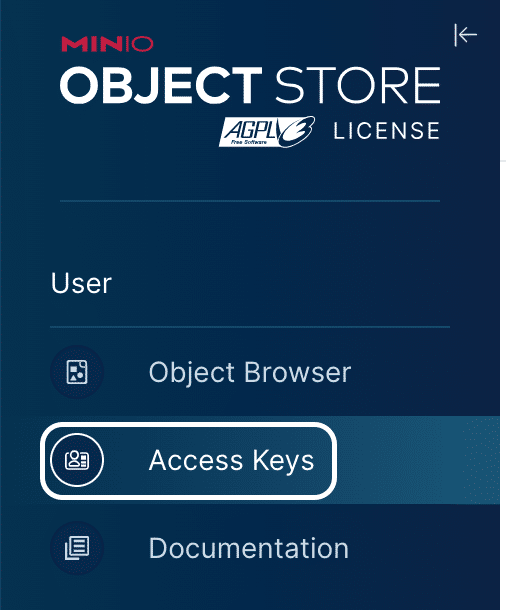
In the new window, click on Create access key +

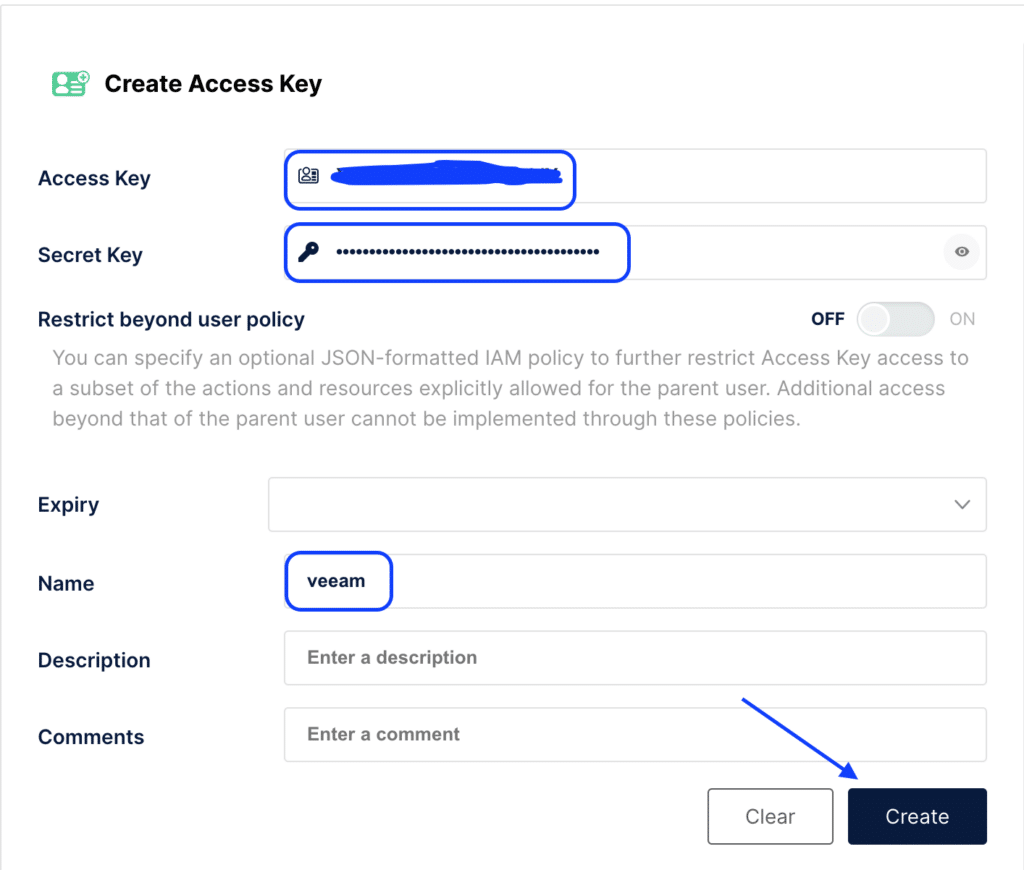
Create a copy of the contents in the Access Key and Secret Key fields and store them in a safe spot. My suggestion is to put them in your password manager. Enter a Name for this key. I’m matching this with the bucket name. Click Create.
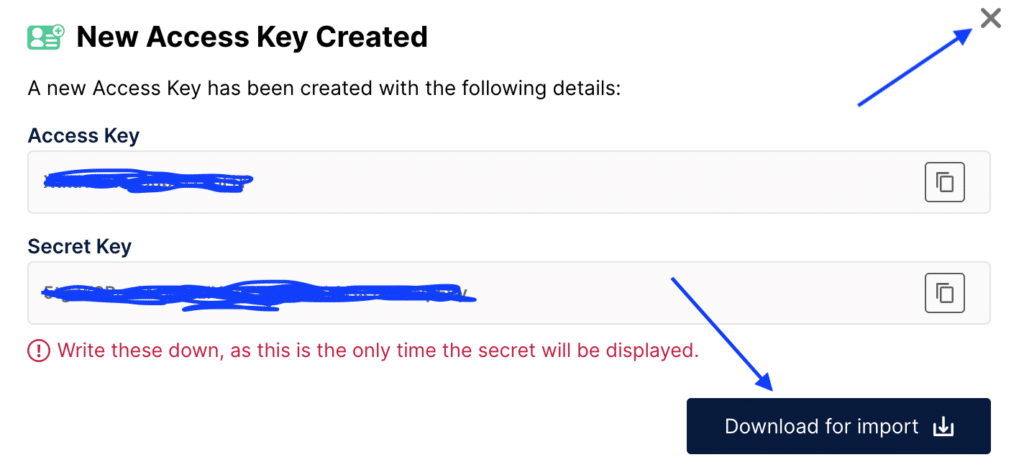
You will be asked to download the new access keys and click the Download for Import button. This file should also be kept in a safe place. You won’t need it for this post, but you might in the future. Click the X on top to close the window.
Veeam Backup and Replication configuration
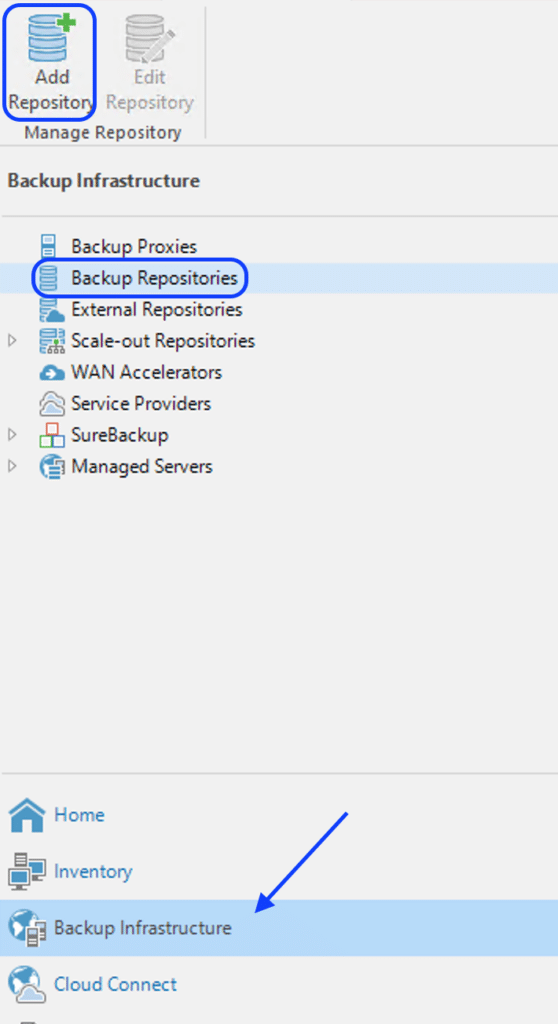
Connect to your Veeam Backup and Replication server using the Veeam Backup & Replication Console. Switch to the Backup Infrastructure view and click on Backup Repositories. In the menu bar on the top left, click Add Repository.
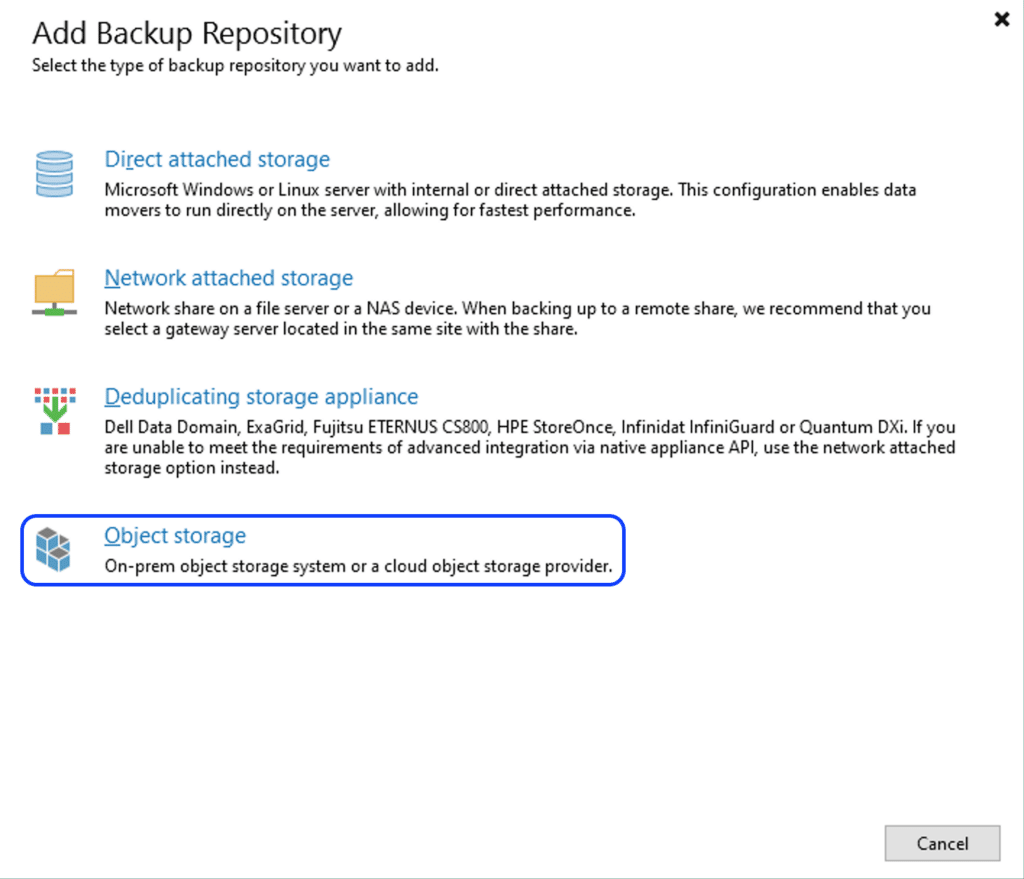
In the Add Backup Repository dialog, click the Object storage option.
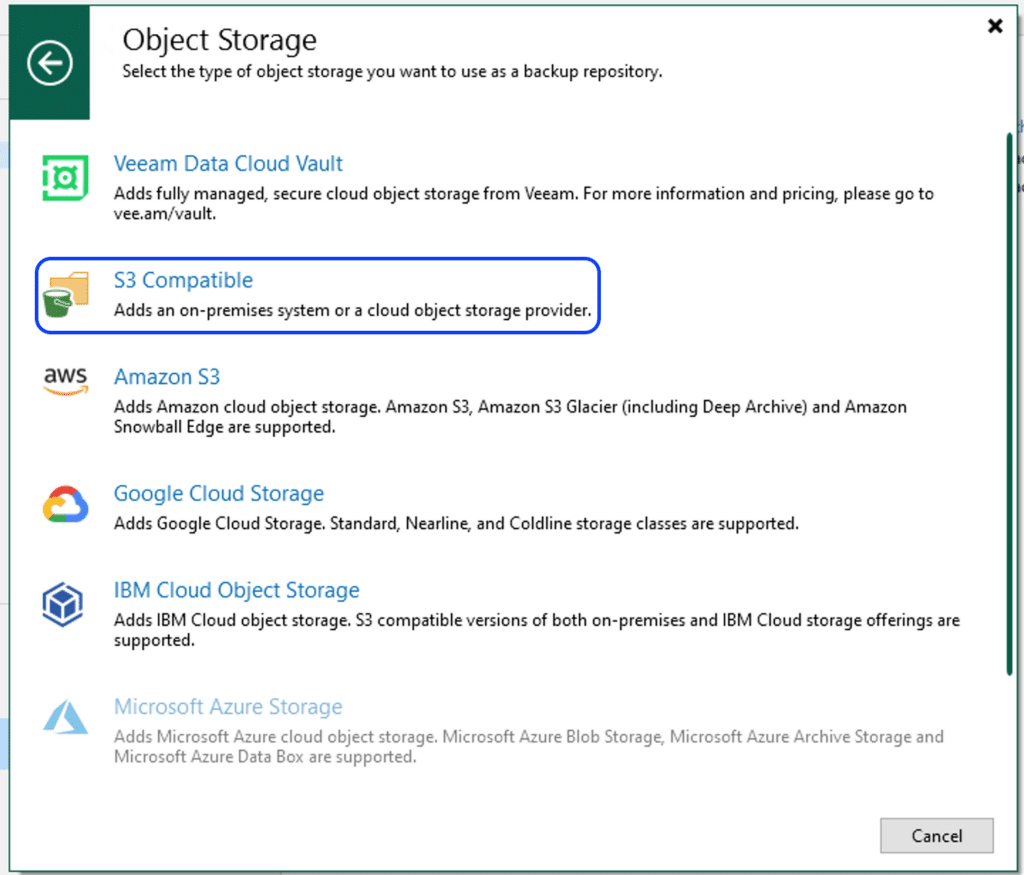
Since MinIO is an on-prem S3 Compatible storage, we must click on S3 Compatible.
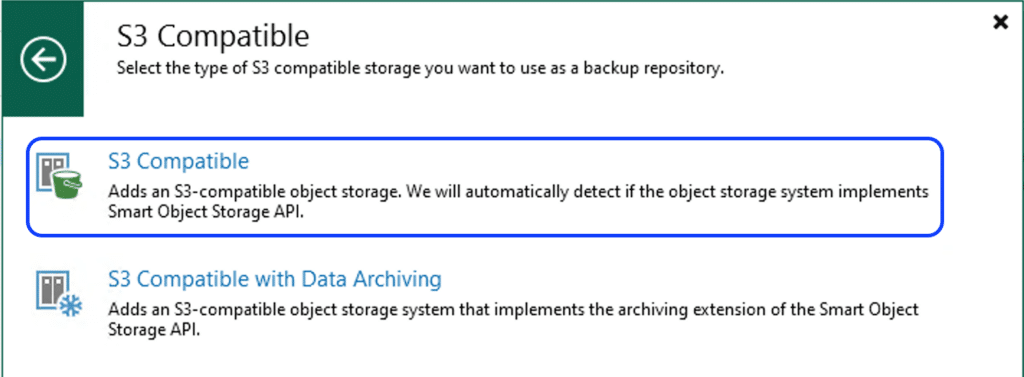
Click the S3 Compatible option.
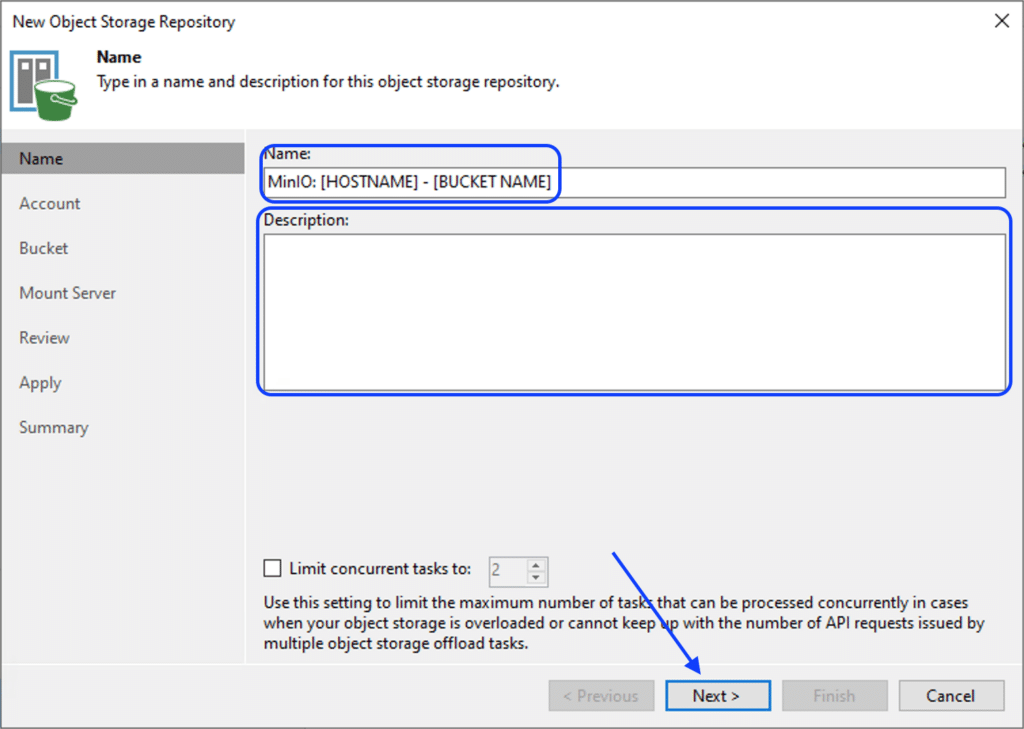
A new window with a wizard will appear, allowing us to set up our New Object Storage. The wizard starts by asking us to give it a name. I prefer “MinIO: [HOSTNAME] – [BUCKET NAME]”, where [HOSTNAME] and [BUCKET NAME] are changed to the hostname and bucket name of your setup. Depending on your preferences, you can change the description to your liking and click Next.
Next, we need to add a Service Point and our Credentials. Click on the Add… button behind Credentials. In the Credentials Dialog, add the Access Key and the Secret Key you created in the MinIO interface. For your own sanity, please add a Description. That way, you can figure out what it’s used for and click on OK
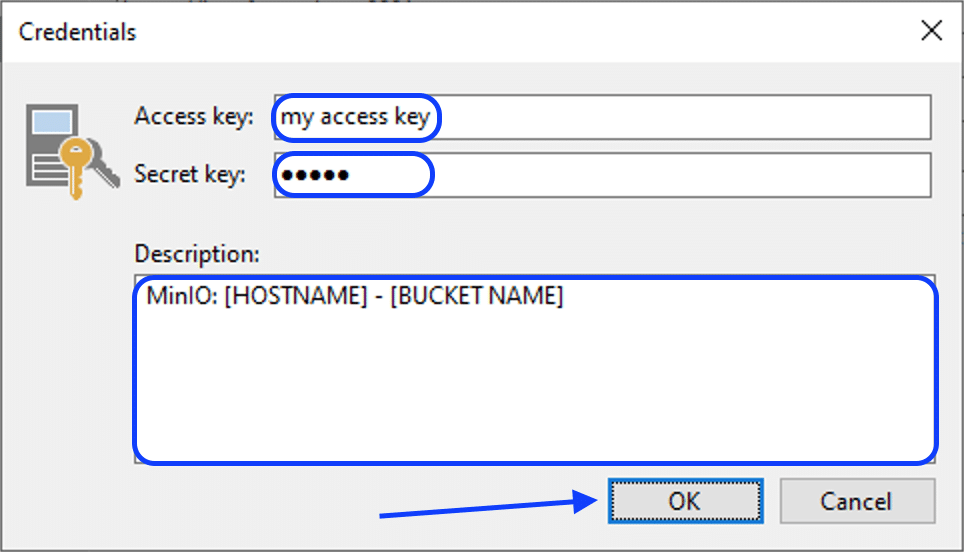
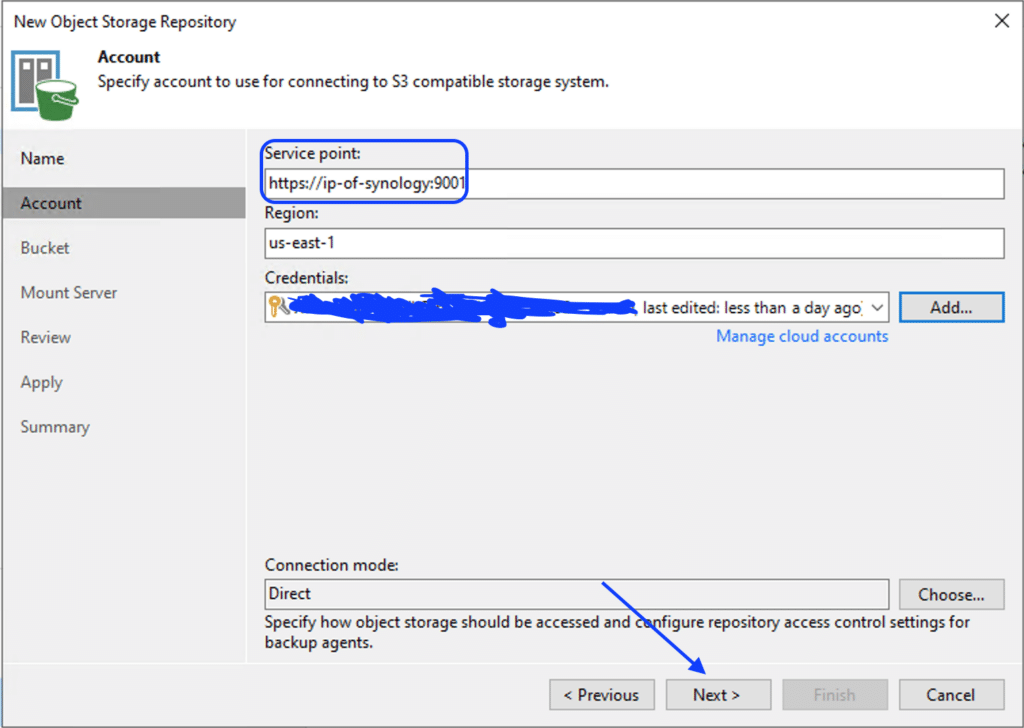
After clicking on OK, our newly created credentials should automatically be selected. Next, we need to enter our Service Point. It will be https://ip-of-synology:9001. Change ip-of-synology to the IP or hostname of your Synology. Click on Next.
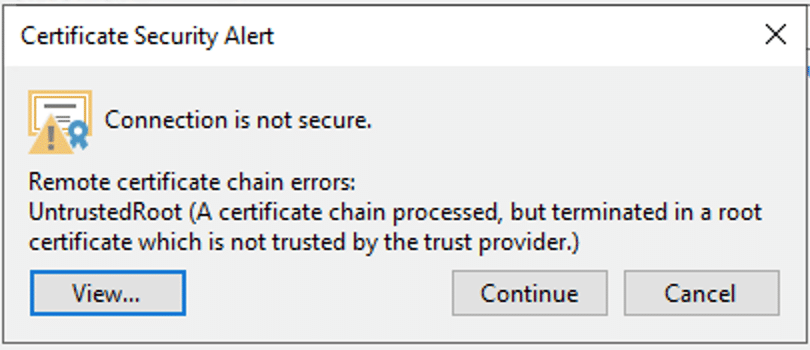
If you have a self-signed certificate, you’ll need to click on Continue to accept that certificate.
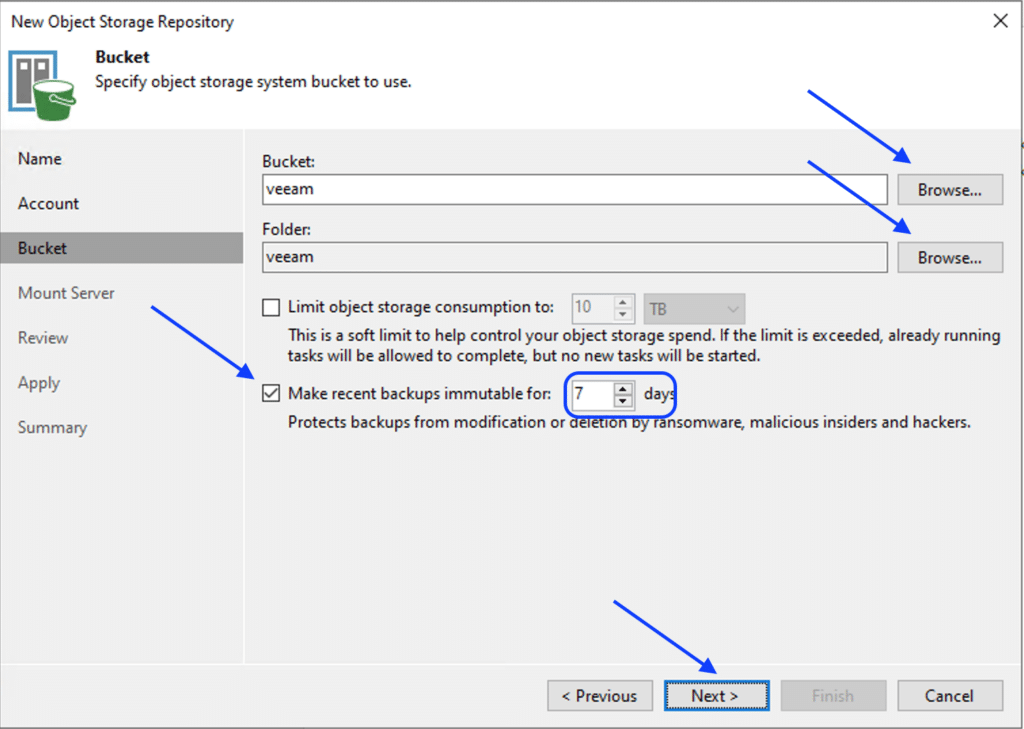
In the next step, we’ll need to define our Bucket, Folder, limits and, most importantly, immutability settings. Next to the Bucket field, click Browse… and select the name of your bucket, in my case, veeam. Click Browse… next to Folder and click on New Folder. Give it a name, e.g. veeam, select it and click OK. Check the checkbox before Make recent backups immutable for:. Change the number of days to a reasonable amount of days. For example, 7.
If you have already set up another repository, you most likely have your Mount Server already set up. Depending on your configuration, this could be your backup server. Make changes as needed and click on Next. On the Review page, click Apply. The apply step could take a few seconds; wait for it to finish and click Next. Review the Summary and click Finish.
You can now add it to your Scale-Out Backup Repository (SOBR). For more information on how to do that, I would like to point you to the official help center.
Hey Maurice,
thank you for this great documentation. it helped me really well 🙂
All thumbs up 🙂